What is the biggest cost in your home?
It is heating!
I will be introducing a home controller project, where I will be focusing on minimizing the consumption of home energy .
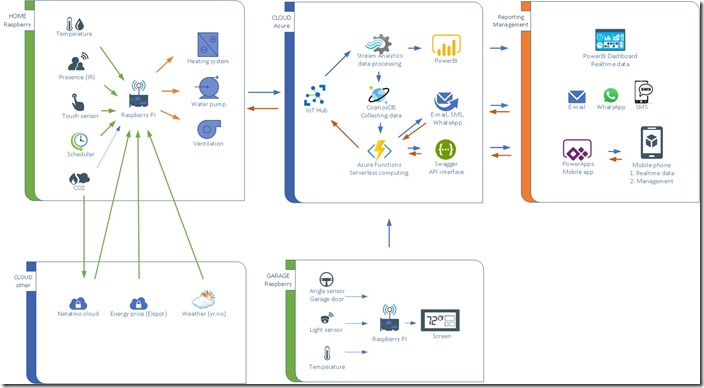
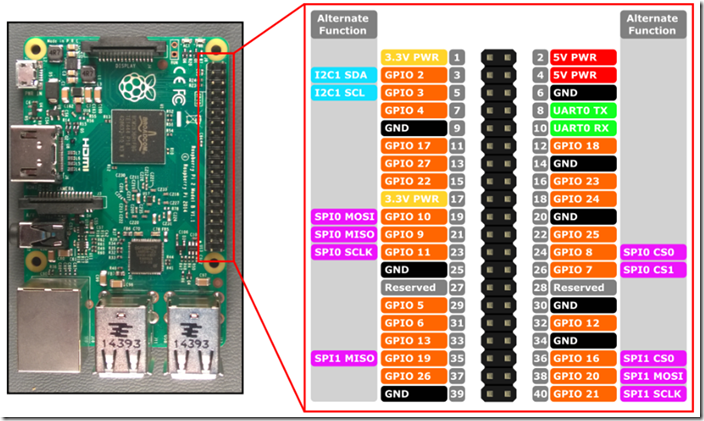
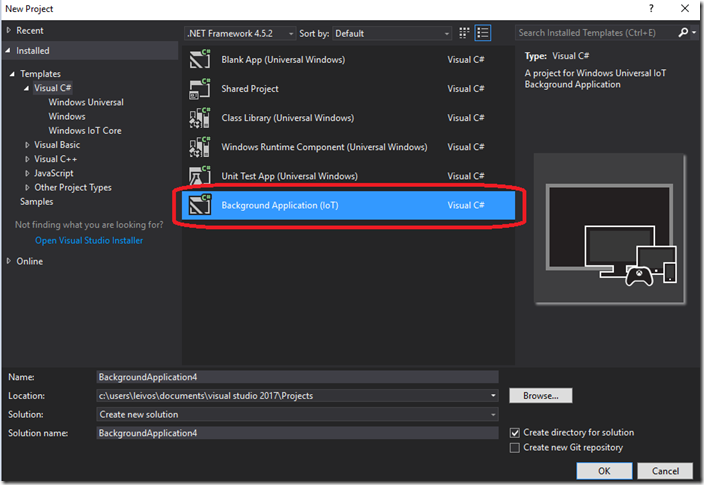
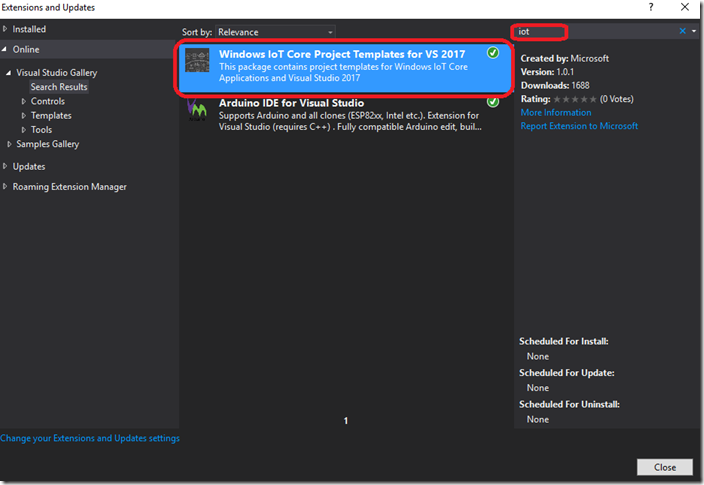
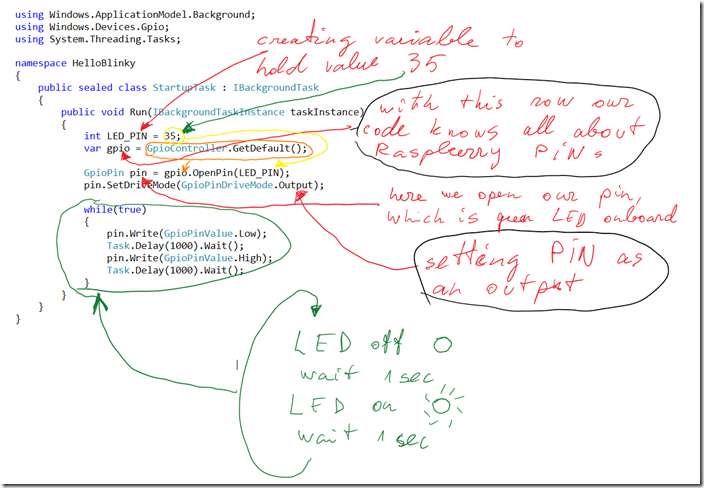
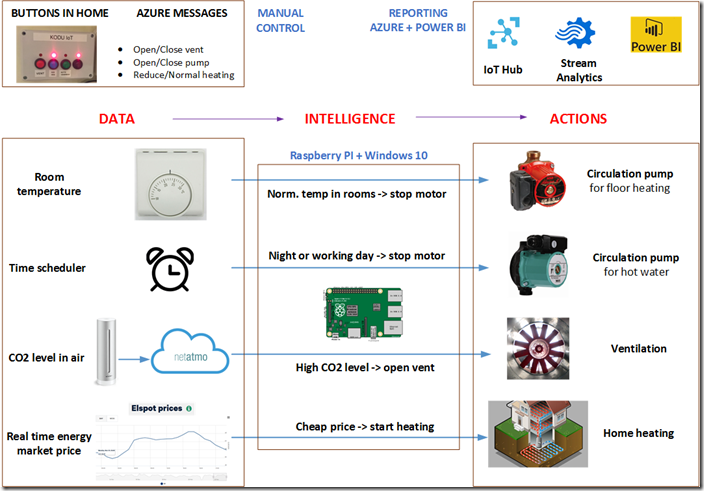
This project uses Microsoft software technology stack like Windows 10 IoT Core, Azure, IoThub and PowerBI. Hardware used for this project is Raspberry PI, OneWire digital temperature sensors, relays, some resistors and transistors.
Where did my story begin?
I had an apartment in a very cool region which has lovely architecture from ages 1950-1970. However, I had 3 major problems there:
1. During the winter we sometimes have –30 degrees and the walls of these buildings are quite thin, my monthly expenditure for heating was sometimes 500 EUR/month.
2. I love kayaking, so I need to keep my 6,5m long kayak somewhere. I cannot take it into my sleeping room.
3. I love to live in a quiet place, but there we had some lovely neighbors with a dog Rottweiler, who was barking almost all the time.
So I started to look for a new home which would be free from these problems. Now we have our own home which is quiet, it has a garage to store the kayak but most importantly, my yearly expenditure for heating the whole home is 1000 EUR using a ground based heat pump.
Even though my monthly costs are so small now, I still wanted to reduce it. I figured out 4 ways for optimization.
What to even optimize on a heat pump?
There are three things you can optimize.
1. Homes with heat pumps have some special pumps (motors), which move water inside the pipes that is inside floor. Usually these pumps are working 24/7. It sounds weird, but yes, no heat pump has been produced that would turn these motors off when room temperature is on normal levels and doesn’t need more heating.
This will be my optimization #1
If room temperature is normal and doesn’t need heating, I can safely turn off this motor to save energy consumption.
2. Usually, these homes have another motor for hot water, which enables you to have instant hot water from the shower. This pump is working 24/7 and I haven’t seen a single solution where it is turned off when there’s no demand for hot water.
This will be my optimization #2
If nobody is at home (children are at school and we are at work) or during the night time when everyone is asleep, this pump can be safely turned off to save energy consumption.
3. Heat pumps are working in automated mode, where they measure the outside temperature and the water temperature inside the heating pipes (outgoing and incoming) and based on that information, the heat pump calculates the heating time to keep the temperature constant in a room.
The heat pump doesn’t know anything about energy price.
But I know. Or the Internet knows.
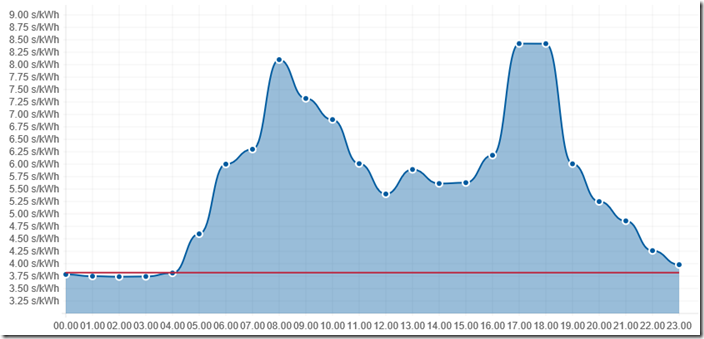
Energy has a market price that will change hourly. The price is very often twice as high in daytime when compared to night time. Take a look at this graph, from 00:00 to 05:00 it has a price of 3,75 s/kWh but at 8:00 or at 18-19:00 the energy price is over 8 s/kWh. It is more than two times higher.
This will be my optimization #3
If energy price is high, my heat pump will be turned off. This is actually the highest energy consumption in my home compared to my other optimizations.
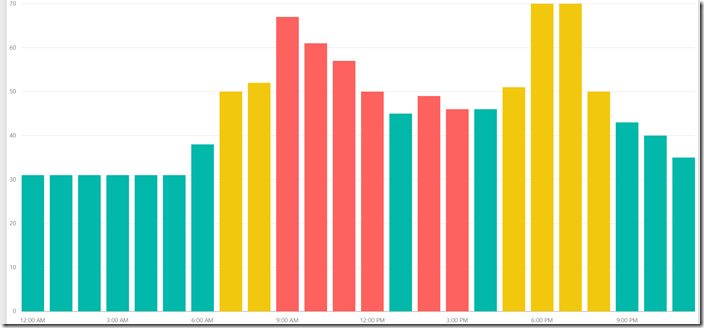
I worked out a special algorithm to avoid a cold home if the energy price is high during the day. My program will calculate 12 cheapest hours during the day and the heat pumps are turned on only during that time. If the energy price is high during the day, I will still calculate the cheapest hours and my heating system will work during that time. The floor is from betony, so it can keep heat for many hours.
Look at the following graph. Green lines will represent 12 cheapest hours during the day, so my heat pump will work actually during periods: 00:00-06:59, 13:00-13:59, 16:00-16:50 and 21:00-23:59, altogether 12 hours in a day.
In order to use this energy price based optimization, you need to have an energy meter which measures your home energy on an hourly basis and you need an hourly based energy contract with your energy provider. I have both, so this optimization has a huge effect on my energy consumption.
What to even optimize with the ventilation system?
My home also has a ventilation system. The ventilation system will ensure that you will have fresh air in your home.
But how do I know the air is fresh? The most important parameter is to measure CO2 level. If this is high, you could turn ventilation on. There is a proved science behind the CO2 level in rooms.
This will be my optimization #4
If CO2 level is high, my ventilation will be turned on, after CO2 level is back on normal levels, ventilation will be turned off.
Do I need reports on how my home is doing?
Initially I though that getting reports is not needed, but when I started to learn about Azure IoTHub, stream analytics and PowerBI, I figured out that asking for reports is so easily achievable, that it would be really stupid not to.
Microsoft has tons of information on how to send data to Azure through Azure IoTHub. That just required a few lines of code and the creation of an Azure IoTHub and I was ready to send data into Azure.
PowerBI is working just out-of-the-box. What I was missing was how to send data from Azure to PowerBI. That was very easy – stream analytics will do all the job for you. So I just needed to create PowerBI reports to see what’s happening at home.
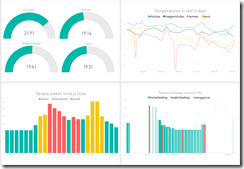
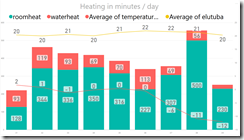
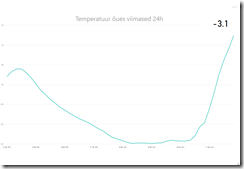
Finally, I have a good PowerBI dashboard to see all different aspects regarding heating time, temperatures, CO2 levels, ventilation etc.
