#3 Registering the Edge device: Set up Azure IoT Edge device
- Posted in:
- Raspberry PI
- Azure
- IoT Edge
Following is a guidance how to set up Raspberry PI from the scratch to working Azure IoT Edge device.
There is a three step-by-step articles.
- #1 Installing Linux (Rasbian-stretch) on Raspberry PI.
- #2 Installing IoT Edge functionality into Raspberry.
- #3 Registering the device as an IoT Edge device in Azure.
Lets do it together step-by-step.
Registering the Edge device
Before you can use your IoT devices with Azure IoT Edge, you need to register them with your IoT hub. Once you register a device, you receive a connection string that can be used to set up your device for IoT Edge workloads.
This is all about creating IoT hub in Azure and then creating/registering new IoT Edge device.
Step 1. Create IoT hub in Azure
I assume that you have already Azure subscription. If not you can get one 12 months subscription here for free: https://azure.microsoft.com/en-us/free/
- Open Azure portal https://portal.azure.com/
- Click “Create new resource”

3. Enter IoT hub for the search box and click Create
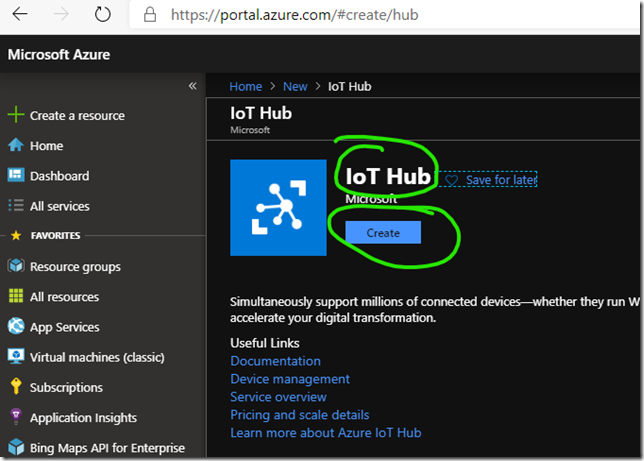
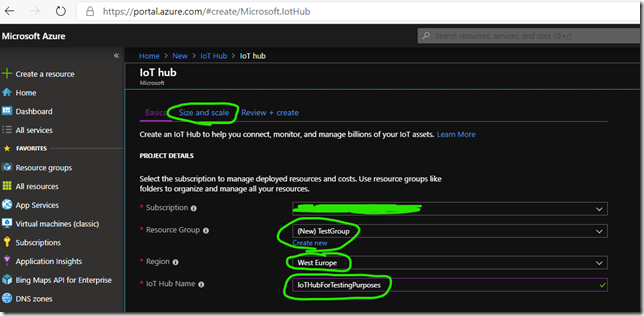
4. Configure IoT hub parameters
- Create new resource group, for example “TestGroup”
- Select the closest region, I have West Europe
- Enter name of your IoT hub, for example IoTHubForTestingPurposes
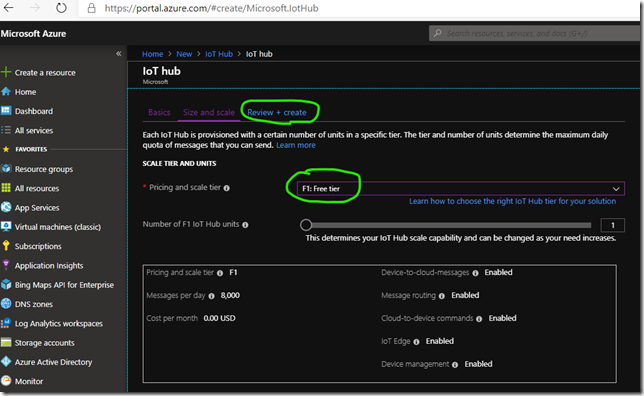
5. Configure pricing
- Open “Size and scale” sheet
- Select pricingand scale: “F1: Free tier”
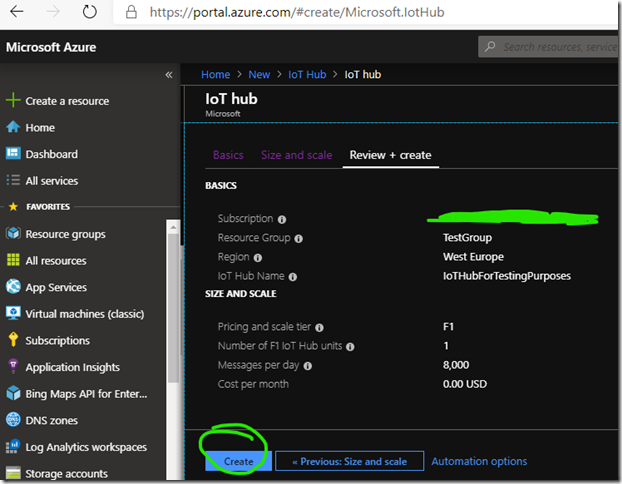
6. Click “Review + create”
Step 2. Create an Edge device
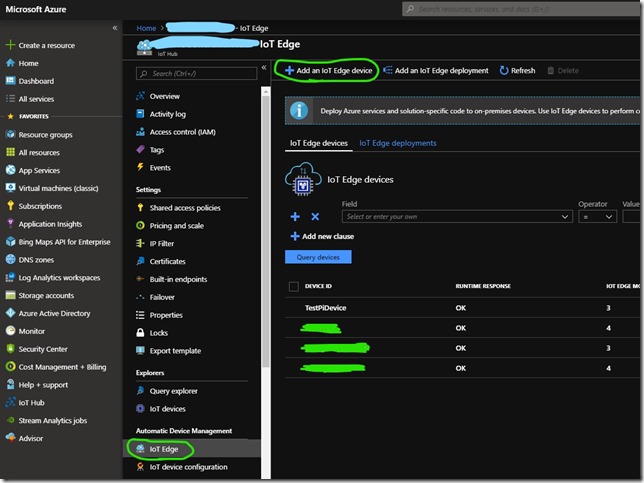
- Navigate to your IoT hub
- Select IoT Edgefrom the menu
- Select Add an IoT Edge device
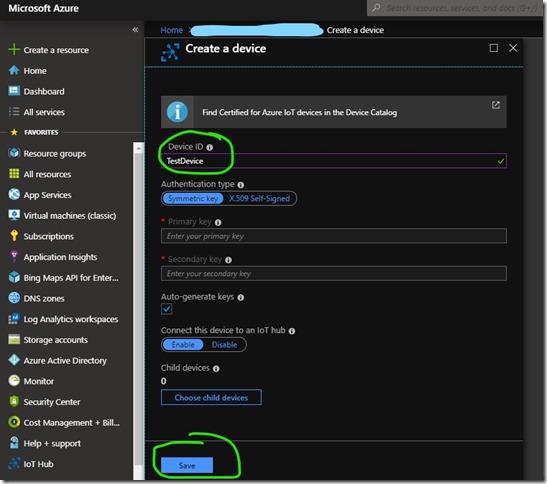
4. Enter name of your device
5. Leave all other information as default and click Save
Step 3. Get the device connection string
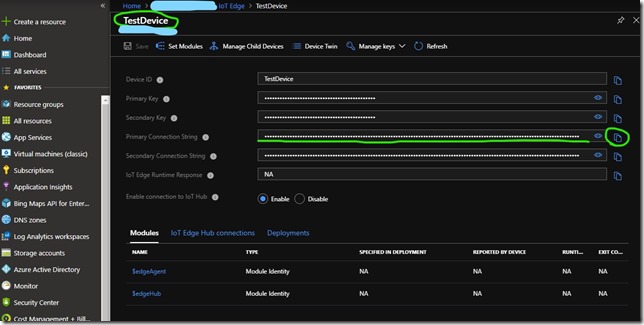
- Openyour IoT Edge device
- Click Copy of Primary Connection String
Step 4. Configure the Raspberry device
As you have now IoT Edge device created in Azure IoT hub you can configure your device to connect to the IoT hub.
In previous step you copied the connection string to your clipboard. Now this has to be placed into Edge device. Based this connection string the device knows where is the cloud and cloud knows how to find and connect with the device.
- Open PuTTY and connect to your device
- Enter following command to open configuration fileconfig.yaml
sudo nano /etc/iotedge/config.yaml
3. Find Manual provisioning section
Find the provisioning configurations of the file and uncomment the Manual provisioning configuration section.
4. Update the value of device_connection_string
Update the value of device_connection_string with the connection string from your IoT Edge device. Make sure any other provisioning sections are commented out.
# Manual provisioning configuration provisioning:
	source: "manual"
	device_connection_string: "HostName=IoTHubForTestingPurposes.azure-devices.net;DeviceId=TestDevice;SharedAccessKey=manynumbersandletters"
# DPS TPM provisioning configuration
5. Save and close the file, CTRL + X, Y, Enter.
- Close the file: Ctrl + X
- Do you want to save: Y
- Exit: Enter
6. Restart your device IoT Edge daemon
sudo systemctl restart iotedge
Congratulation: you have now a working Azure IoT Edge device!
We can start to develop solutions on it but there are some tricky things so I will publish additional guidance's for tips and tricks.