#1 Install Linux on Raspberry: Set up Azure IoT Edge device
- Posted in:
- Raspberry PI
- IoT Edge
- Azure
Following is a guidance how to set up Raspberry PI from the scratch to working Azure IoT Edge device.
There is a three step-by-step articles.
- #1 Installing Linux(Rasbian-stretch) on Raspberry PI.
- #2 Installing IoT Edgefunctionality into Raspberry.
- #3 Registering the deviceas an IoT Edge device in Azure.
Lets do it together step-by-step.
Installing Linux (Rasbian) on Raspberry PI
This is the article about supported Azure IoT Edge systems. Only Raspbian Debian 11 (bullseye) is currently fully supported.
Step 1. Download Raspbian-bullseye image
- Download the Raspbian-bullseye lite image from the archive here: https://downloads.raspberrypi.org/raspios_lite_armhf/images/raspios_lite_armhf-2022-09-26/
- Downloadthe latest and greatest version of Raspbian Bullseye.
- Unpack the image to your hard drive.
Step 2. Burn the image to the SD card
For this step I am using Win32 Disk Imager which can be downloaded here: https://sourceforge.net/projects/win32diskimager/
- Download Disk Imager and install it to your PC.
- Run the Disk Imager
- Select image file you just downloaded and unpacked from Raspbian
- Select SD card as your device (use at least8Gb or bigger SD card)
- Click Write!
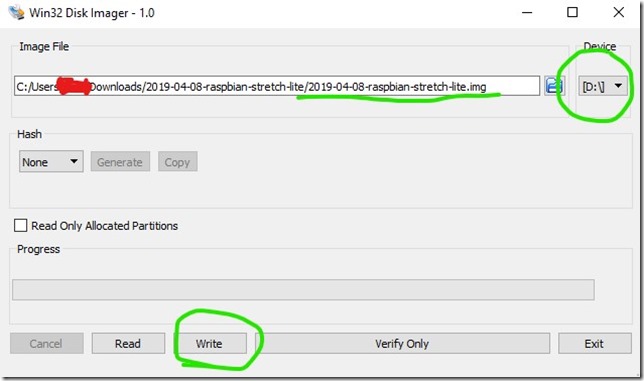
When the process complete you may see some prompts that the drive is not ready would you like format it etc.
Don't do this! Don’t format!

There is just one partition named boot which can read. Do not touch other partitions.
Step 3. Enable SSH
SSH is used to access remotely to your Raspberry. You definitely need this so don’t think this is unnecessary step.
- Open boot drive from the SD card
- Create empty file named ssh on that drive (without any extension). No content, nothing, just 0 byte file.
Step 3.1 Add user
For security reason Debian 11 has removed the default user for Raspberry. This mean that after installation you cannot log in remotely through SSH as you dont have any user.
- Open boot drive from the SD card
- Create empty file named userconf.txton that drive.
- Add the following content. This content will create a username piwith password password.
pi:$6$38HiUnLhwlE1DRdL$MHHb6/OsyAlZNqmW7igj333g/CRwG/g5nls7ylTEqZZg9rOIM/cUvE962.5x6M0ONMz/r6OlBy/G6f4v8zrH51
Step 4. Add WiFi network
This step is makes your Raspberry PI connected into your WiFi network after booting.
- Open bootdrive from the SD card.
- Create a file named wpa_supplicant.conf
- Open this file with Notepad and add your WiFi network information.
Btw, my favorite notepad is Notepad++.
ctrl_interface=/run/wpa_supplicant
update_config=1
country=US
network={
	ssid="NETWORK-NAME"
	psk="NETWORK-PASSWORD"
}
Step 5. Enable I2C and SPI protocols
This step will make I2C and SPI connections available. By default they are disabled but many modern sensors are using especially I2C protocol.
- Open bootdrive from the SD card
- Open existing file config.txt
- Find the lines and uncomment all three lines
dtparam=i2c_arm=on
dtparam=i2s=on
dtparam=spi=on

Step 6. Take the SD card and boot your Raspberry
Now is finally time to take out the SD card from your PC and start the Raspberry from it.
- Remove SD card from your PC
- Put it into Raspberry
- Plug the power cable
- Let the Raspberry boot, up to 2 minutes
Step 7. Login to your Raspberry PI through ssh
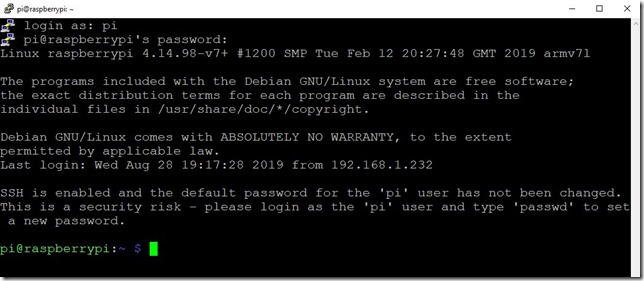
Now we will log in into the Raspberry to make some additional changes. For this step we need additional software for example PuTTY.
- Downloadand installPuTTY
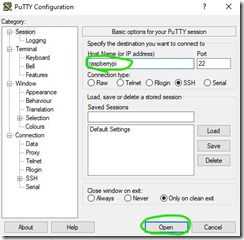
- OpenPuTTY
- Connect to your Raspberry,
- the name of your fresh Raspberry is just raspberrypi
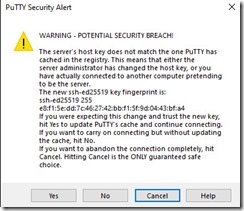
- First time PuTTY asks security question, Correct answer is Yes
- Loginto your Raspberry
- Username: pi
- Password: raspberry
- You are in!
Step 8. Change your Raspberry name!
You can’t have many devices with the same name. It will be mesh. So better to change the name right now.
- Run the following command on your Raspberry:
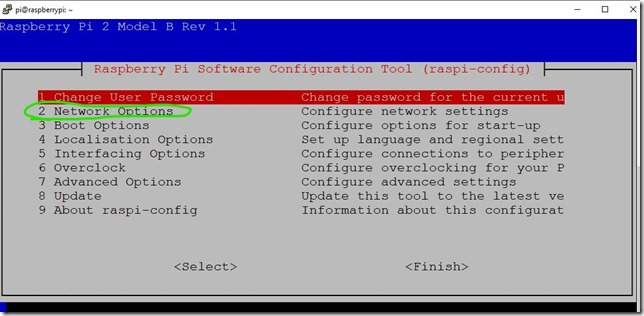
sudo raspi-config
2. Go to Network Options
3. Go to Hostname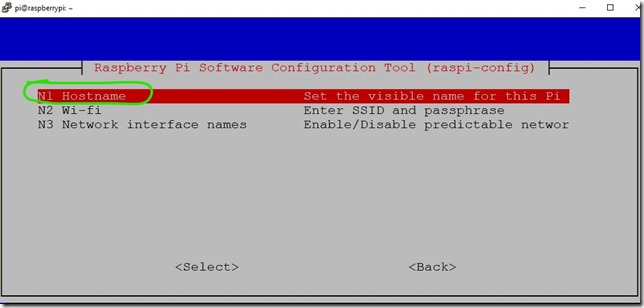
4. Enter new name for this Raspberry, for example testpi and press OK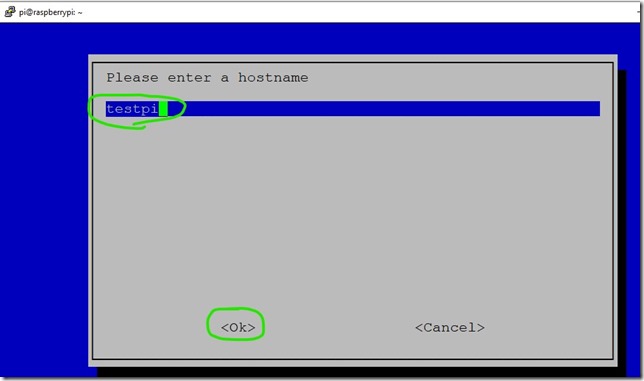
5. Press Finishand let the Raspberry boot
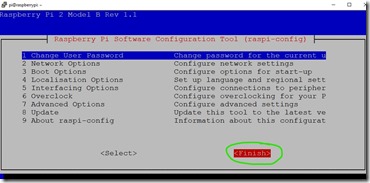

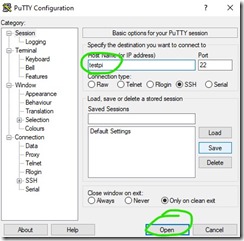
Step 9. Login with the new name testpi
Step 10. Get the updates
To get the important updates run the command:
sudo apt-get update

Congratulation: Your Raspberry PI setup is done. Please follow the next article to make this Raspberry as an IoT Edge capable device.
Next step: #2 Installing IoT Edge functionality into Raspberry
